One of the most alluring aspects of photography is the fact that you can take some really incredible shots at any time of the day or night. As photography is simply the ability to capture light, it makes perfect sense that “Long Exposure” photography plays on that key concept. The difficult part however, is how to capture the light to create those tantalizing images you see in all of the magazines and the internet.
With this blog post, I hope to show you just how easy it is to capture gorgeous scenes for you and others to cherish for a lifetime. Read on to experience the 7 easy tips for amazing long exposure photographs that will overall improve your long exposure photography.
- Recommended Equipment
- Tripod:
The first and foremost important piece of equipment (aside from a camera) you’ll need to take a perfectly long exposed photograph will be a tripod. This critical piece of equipment is great to have for other photographs as well; however, it is absolutely necessary to get your long exposure photography down. Always be sure to properly mount your camera onto the tripod (and that your tripod is quite sturdy) before using it. (Our Tripods: MeFoto Travel Tripod Kit, Green (A0350Q0G))
- Your Camera:
You’re probably thinking, “Of course I’ll need a camera!” But what many people assume is that you can only do Long Exposure photography with an SLR (digital or film). However, there are some advanced point-and-shoot cameras that can do long exposures as well, so long as they have the Shutter Priority setting. - Remote Trigger:
One of the key points about attempting long exposure photography is the ability to keep your camera quite still for a long period of time. (In the photography world, even 2 seconds can be considered a long time.) So, one way to ensure that even while triggering the shutter won’t cause movement, is to buy one of these. (Also known as a “Cable Release”.) You can find various ones, and depending on your camera, even wireless ones. If you cannot afford one at this time, one thing you can use is your camera’s self-timer function to trigger the shutter. - ND Filters:
If you are photographing a waterfall or other landscapes in the daylight, you will need an ND filter in order to be able to stop down your shutter to capture the movement of the water or other activities during the day. This goes hand in hand with photography capturing light, and in order to capture longer exposed photos during the day, an ND filter is a must. - Warm Clothes, Comfy Shoes, Patience:
Last but definitely not least on the list of equipment, is to be sure that you have warm clothes (depending on location), comfy shoes (you’ll be standing around a lot), and of course, patience. You’ll be doing a lot of standing around, moving the camera around, and working at night (sometimes). As such, you’ll need patience and determination to not be deterred if your photographs aren’t turning out how you are hoping they will. Your photographs will turn out better if you are comfortable and patient. Trust me!

- Tripod:
- What are some of the best subjects for Long Exposure Photography?
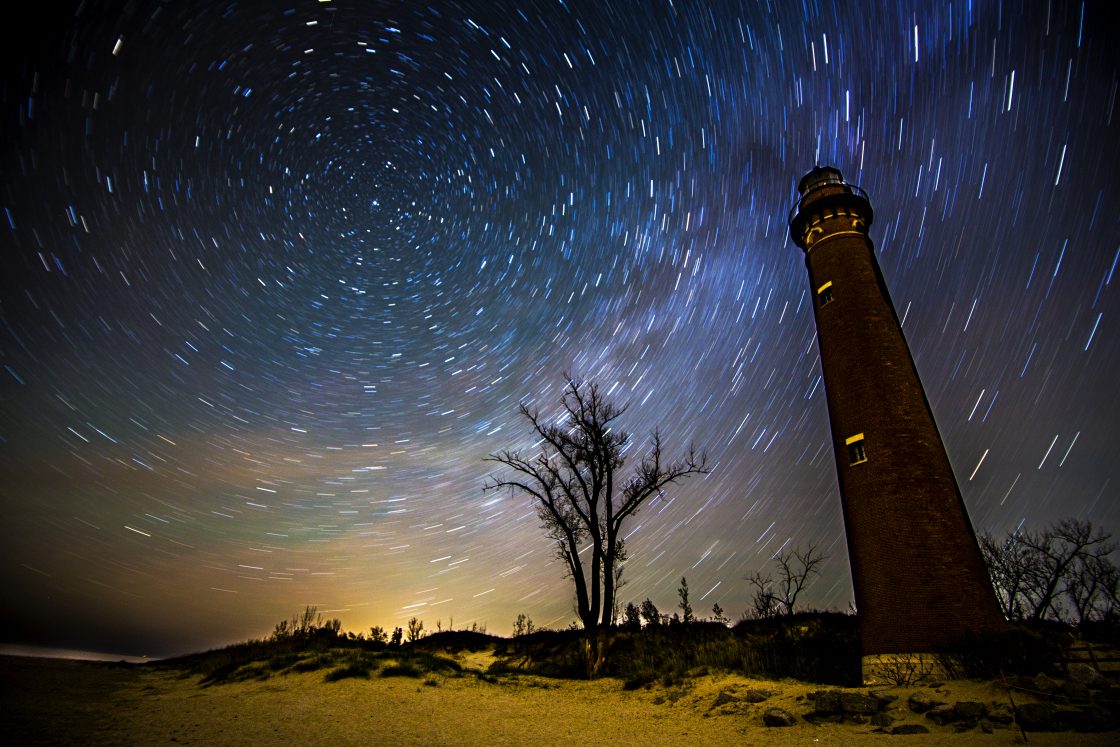
In my experience, some of the best subjects for long exposures are waterscapes, landscapes, and of course, cityscapes. The most entrancing long exposure photographs are those that have two elements: movement, and stillness. Things that are constantly in motion, like cars, clouds, stars, water, and trees, make for interesting photographs when paired with stationary objects. The reason these pair so well together is that when they come together in a photograph, you get to see something that you cannot otherwise see with your naked eye. When you take a long exposure, you are capturing more than a mere moment in time. You are capturing time in of it-self and you are in a way, warping it. While doing long exposures, you’ll see that water looks like a mere mist, or glassy, trees look blurred as they’re blowing in the wind, clouds can become long and streaky, and the stars… You can see how the stars move.

- What camera settings should I use?
While photographing long exposures (and everything else I shoot as well), I use the manual mode of my camera. However, if you are not well versed in how to completely use your camera on Manual, you can use other semi-manual modes of your camera such as Aperture Priority or Shutter Priority. For consistent results, you can follow these guidelines for your settings:- Shutter Speed:
Dependent upon how well your scenery is lit up, you’re going to want to time your shutter speed to at least 10 or 15 seconds. However, don’t forget that you can also do long exposures during the day, in which case, generally 5 seconds will be long enough. This is also true for waterscapes where water is moving quickly. If you are shooting stars, and you don’t want star trails, then be sure to expose for no more than 20 seconds. - Aperture:
You will want your aperture to be very small indeed for many long exposures. When exactly? Daytime, in particular, and also when you’d like to take advantage of the diffraction (more on this in a moment) that having a small aperture gives you. Not only does this push your shutter speed to a slower speed, but it also captures light in a very unique way. Have you seen photographs where lights or even the sun look like beautiful starbursts of color? They were using a very small aperture and taking advantage of diffraction. For scenes that have very little light, like taking photographs of the stars, you’re going to need a wide open aperture. As you can see, your aperture decision is very dependent upon the scene, and how much light you want to expose for. - ISO:
Always try to aim for 100 ISO (or the lowest possible ISO setting you can manage) for your long exposures. However, this is different if you’re trying to capture very little light as in star shots of the Milky Way. In those instances, I find that using 1600 ISO or so (depending on the location) is perfect for capturing the Milky Way.

- Shutter Speed:
- How about the best time of day to shoot long exposures?
The ideal time to take a long exposure is anytime during or after the setting of the sun. Always try to be on scene about an hour before the sun sets that way you can do some quick test shots that will test your settings as well as your composition of the photograph. After your testing is done, simply sit back, relax, and enjoy the scene as it unfolds before you. Every time you take a long exposure, it will be different from the last, and you’ll want to start shooting about 15 minutes before the sun has completely set. If you don’t get the photograph you’re looking for, simply return to the spot a couple more times throughout the week and before you know it, you’ll have the photograph you wanted as well as plenty of practice to draw upon later on. For star shots (regardless if they’re star trails or not), you’ll want to wait at least an hour after the sun has set. Doing this will help you to get the “Blue Hour” in the direction of where the sun set, as well as plenty of darkness to see more of the stars in the sky. Trust me, the patience and practicing will be more than rewarding!

- How should I compose my long exposure photograph?
In order to figure out the perfect composition for your long exposure photograph, be sure to scout the location ahead of time. Just be mindful that long exposures look completely different than they do with your own eyes. You have to envision the photograph in your mind, looking for a pleasing way that includes moving subjects, the direction of the clouds, or the force of the sea. Try to discount the sun as you’re envisioning this, because its movement will ruin the shot and will overexpose the clouds in a way that is not recoverable. If you cannot avoid the sun, then try your best to wait for it to go behind a cloud or two. Again, patience my friends!

- You mentioned the ND filter… When exactly do I use this?
Anytime you want your shutter to be longer during the day, you’ll want to use an ND Filter. So say, you’re trying to get a smooth silky waterfall, instead of a choppy one. Place an ND Filter on your camera to stop down your shutter speed so you can capture the movement of the water more, and return with a gorgeous photograph of silky smooth water. The same can be said of clouds and other daylight things. Even street photography can be done using an ND filter. Notice someone standing still while everyone else is hustling and bustling by? Throw your ND Filter on, and capture the one object or person standing still while the rest of the world wizzes by. The best part about Long Exposure photography is that it can be practiced at almost any time of the day or night, and can still produce really imaginative and fun photographs.

- Last but not least; practice, practice, practice!
Now that you know all of the basics on how to do a long exposure photograph, go out and try it! Attempt to learn how to get the best photographs you can imagine that show a wide variety of moving and non-moving objects merging together into a beautiful and almost unreal scene. Also, the more you practice, the more you can apply these techniques and others into your everyday photography as well. How, you ask? Well, once you understand how a camera captures light relative to exposure time, you can apply this knowledge to get sharp photographs by “freezing” the action happening on the scene. It’s amazing what all you can learn just by practicing something as fun as long exposure photography! But don’t take my word for it. Get out and photograph your heart out!
I hope after reviewing the 7 steps listed above, as well as the photographs attached for reference, will help you in your quest to learn more of the mysterious ways of Long Exposure photography. If you have any questions about this article or anything else pertaining to photography, please comment below! Also, if you feel I’ve missed anything or you would like to add something, please let us know in the comments below or send us an email. Thank you all for reading, and I hope you’ve enjoyed these tips. I hope to see your long exposure photographs below!
